This sample demonstrates how the Mountain erosion node works.
Select Help > Samples to access the sample project.
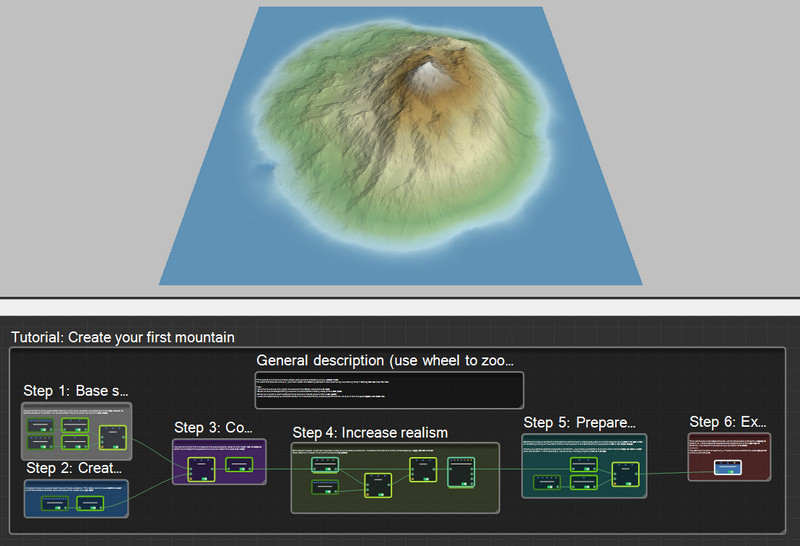
This sample shows a simple graph designed to create a single, procedural mountain. You can watch the corresponding video tutorial by selecting Help > Getting started video in the main menu.
Tips:
- Use the mouse to navigate inside both the Graph editor and the Viewport.
- Click on the corresponding node to view the terrain at any step of the creation process.
- Click on a node's connector pins to see the inputs used or the outputs generated.
- Lock the 3D display so that the terrain or mask currently displayed remains visible in the Viewport, regardless of the selected node.
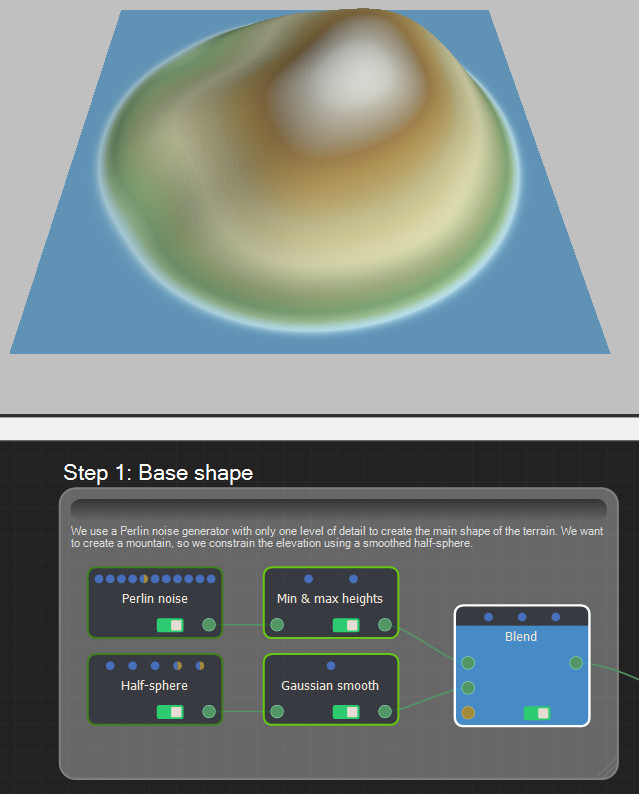
Step 1: Base shape
We use a Perlin noise generator with only one level of detail to create the main shape of the terrain. We want to create a mountain, so we constrain the elevation using a smoothed half-sphere.
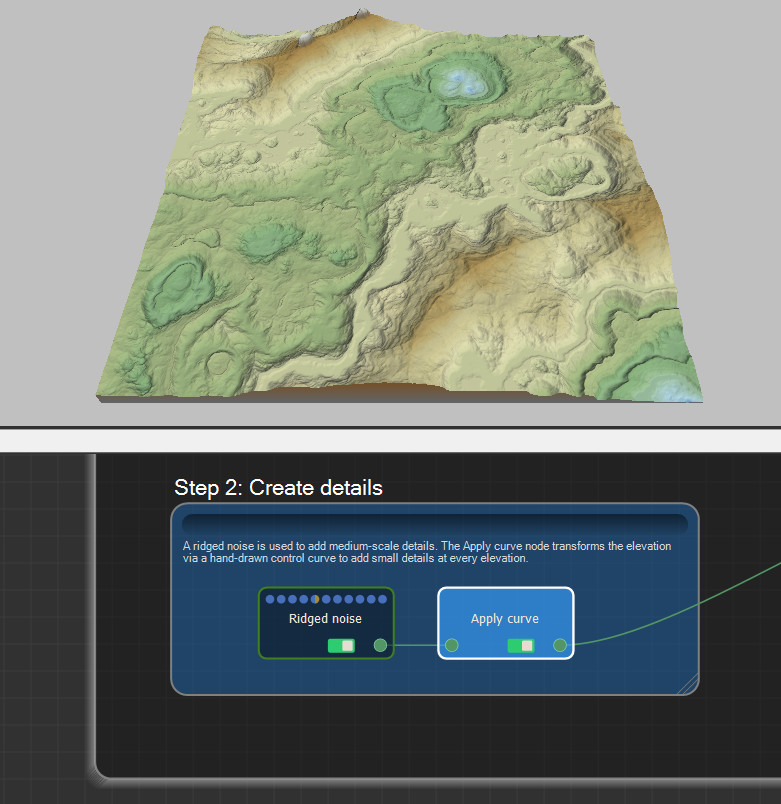
Step 2: Create details
A ridged noise is used to add medium-scale details. The Apply curve node transforms the elevation via a hand-drawn control curve to add small details at every elevation.
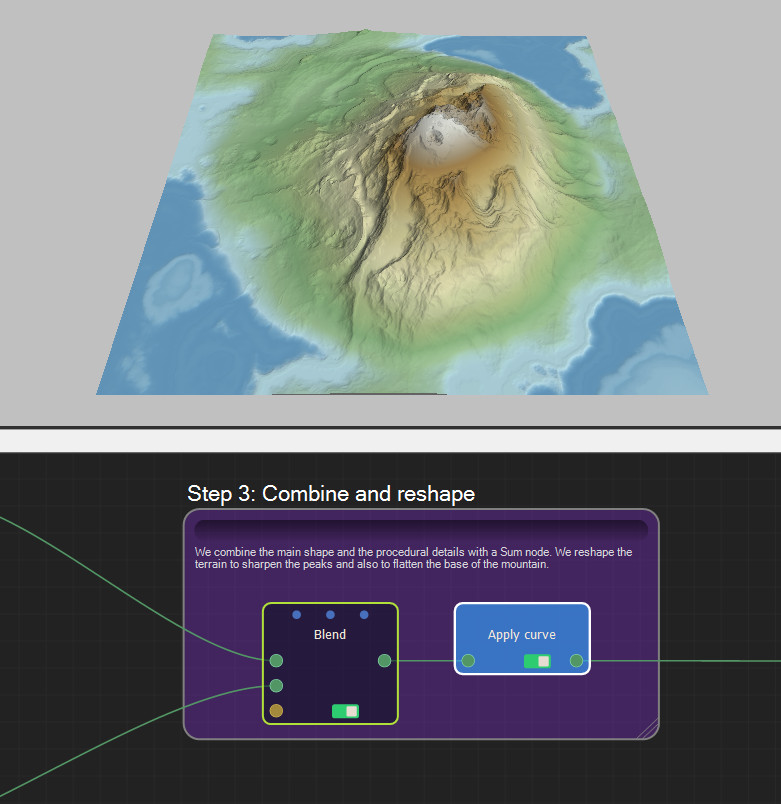
Step 3: Combine and reshape
We combine the main shape and the procedural details with a Blend node. We reshape the terrain to sharpen the peaks and also to flatten the base of the mountain.
Step 4: Increase realism
Simulation nodes, such as mountain erosion or hydraulic erosion, increase the realism of the landscape by applying different effects to the terrain.
Note: Erosion nodes involve time-consuming processes.

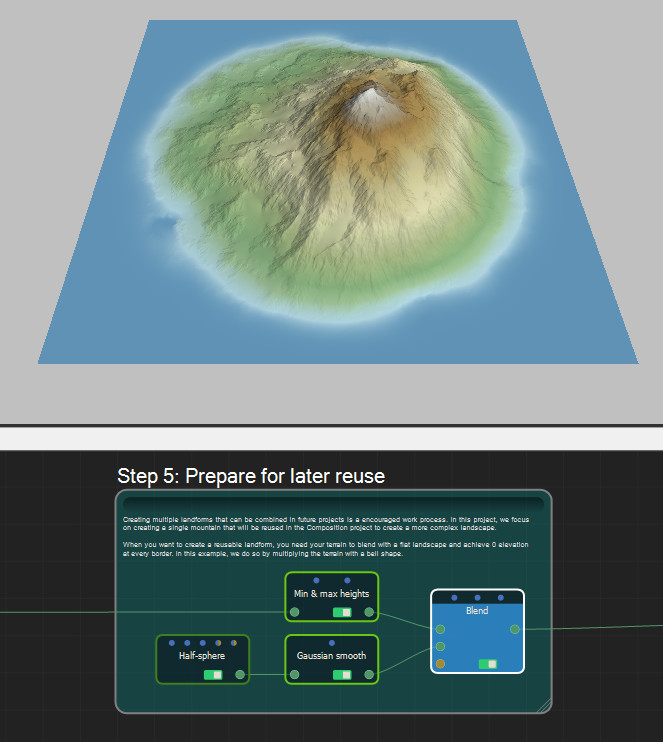
Step 5: Prepare for later reuse
Creating multiple landforms that can be combined in future projects is a useful work process. In this project, we focus on creating a single mountain that will be reused in the Composition project to create a more complex landscape.
When you want to create a reusable landform, you need your terrain to blend with a flat landscape and achieve 0 elevation at every border. In this example, we do so by multiplying the terrain with a bell shape.
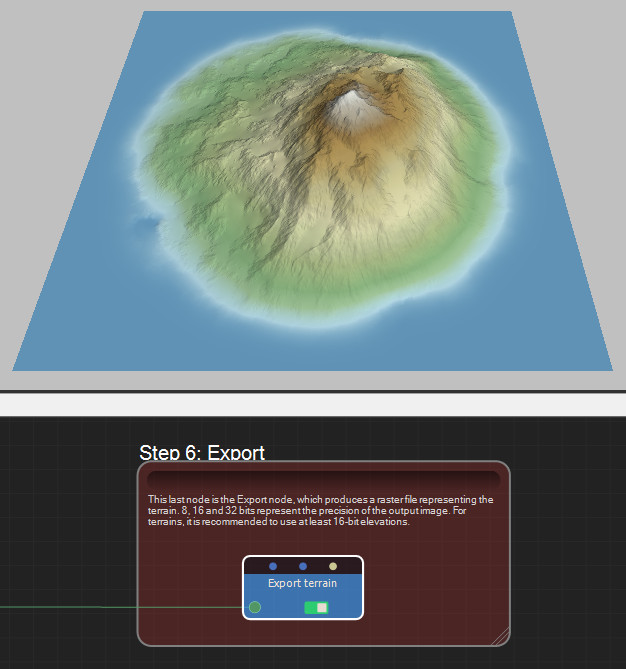
Step 6: Export
This last node is the Export node, which produces a raster file representing the terrain. 8, 16 and 32 bits represent the precision of the output image. For terrains, it is recommended to use at least 16-bit elevations.
Copyright © 2022 · All Rights Reserved · Wysilab