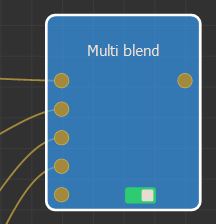
Adding a mask Multi blend node
This node blends an unlimited number (in practice up to 10) of masks using the different blend modes available in Instant Terra.
By default, it has three input connectors:
- The first is the mask, which serves as a base. It determines the size of the mask. All other masks are blended onto this one.
- The second is the mask to blend with the first one. It constitutes the first layer of the node. Several other layers can be added.
- The last connector is an optional mask used to define the places where the blending should take place. It is shared by all layers.
If two different masks are needed for two layers, two Multi blend, Blend, or Full composition nodes must be used instead of one Multi blend node.
To add a node, right-click in the Graph Editor and select Create Node > Mask composition > Multi blend.
Double click on the node to open its parameters:
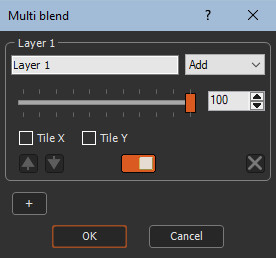
Editing the Multi blend node
- Layer: Assign a name to a layer. The default name is "Layer 1" for the first layer, "Layer 2" for the second, and so on.
- Blend mode: Select a blend mode from the
drop-down list.
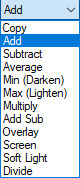
These modes are the same as those of the Blend and Full composition nodes.
- Blending ratio: Use the slider to define the
proportion of blending from 0 (no effect) to 100 (complete
blending).

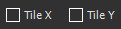
- Tile X and Tile Y: Check the options to repeat
the mask along the X axis or along the Y axis.
- Activate or deactivate a layer: Use the button
to enable and disable layers.

- Add a layer: Use the
 button to add a
layer. The node acquires an additional input connector to connect
the mask of the new layer.
button to add a
layer. The node acquires an additional input connector to connect
the mask of the new layer.

- Delete a layer: If the node has several
layers, click on the delete button
 of a layer to
delete it. The connector associated with the layer is
deleted.
of a layer to
delete it. The connector associated with the layer is
deleted. - Change the layer order: The order in which the
different layers are applied affects the final result. Change the
order of the layers by using the buttons
 to move up or down
a layer. The connectors follow the order of the layers.
to move up or down
a layer. The connectors follow the order of the layers. - Change the scale of a mask layer: By default,
the mask layer retains its initial size. If it is not the same size
as the output mask, it only covers part of the output mask it is
smaller and only part of this mask will be blended if it is larger.
The operation is therefore similar to that of the Full composition
node (the mask to blend retains its default size), rather than that
of the Blend node
(the mask to blend is automatically scaled). If the mask layer is
not the same size as the output mask, the Scale button
 scales it so that
it covers the entire mask.
scales it so that
it covers the entire mask.
Conversely, the Reset button below reverts the
mask to its original size.
below reverts the
mask to its original size. - Translate, rotate, or scale a mask with the
manipulator: Â When you select a layer, a manipulator
appears in the 3D window to move the mask layer.
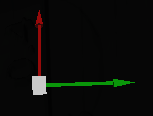
By clicking the right mouse button for the first time, the scale manipulator opens.
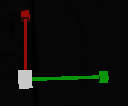
Clicking a second time with the right mouse button opens the rotation manipulator.
A third click opens the translation manipulatorThe Scale and Reset buttons also reset the translation (back to center) and rotation (no more rotation).
Parameters
| Parameter | Use |
|---|---|
| Layer | Assigns a name to a layer |
| Blend modes | Selects a blend mode |
| Blending ratio | Defines the proportion of blending, from 0 (no effect) to 100 (complete blending). |
| Tile X and Tile Y | Repeats the mask along the X axis or along the Y axis. |
|
|
Activates or deactivates a layer |
|
|
Adds a layer |
|
|
Deletes a layer |
|
|
Changes the scale of a mask layer |
|
|
Reverts the mask to its original size. |