The color management workflow helps you get started with color maps. You will learn how to:
- Import and apply a color map
- Compose terrains with color maps
- Extract a color map from a terrain composition and apply it to another terrain
- Export a color map
More detailed information about each step of the
workflow can be found in the dedicated pages of this
documentation:
Import color
map node - Apply
color map node - Extract
color map node - Export color map
node
Import and apply a color map
The Import color map node imports a color map in the form of an image file (see Import color map node for the full list of file formats) that you can apply to a terrain generation node, a transformation node, or a composition node via the Apply color map node. The output terrain is the same terrain as the input terrain, but with a color map applied to it. The color map is preserved throughout the graph unless a new color map is applied.
In this workflow, we will begin by importing and applying a color map to a Perlin noise generator.
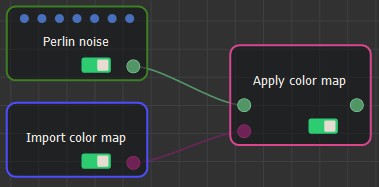
- To begin, right-click in the Graph and select:
- Create node > Import > Import color map to add the color map node.
- Create node > Terrain generation > Perlin noise to add the Perlin noise node.
- Create node > Color > Apply color map to add the Apply color map node.
- Link the Import color map node and the Perlin noise node to the Apply color map node.
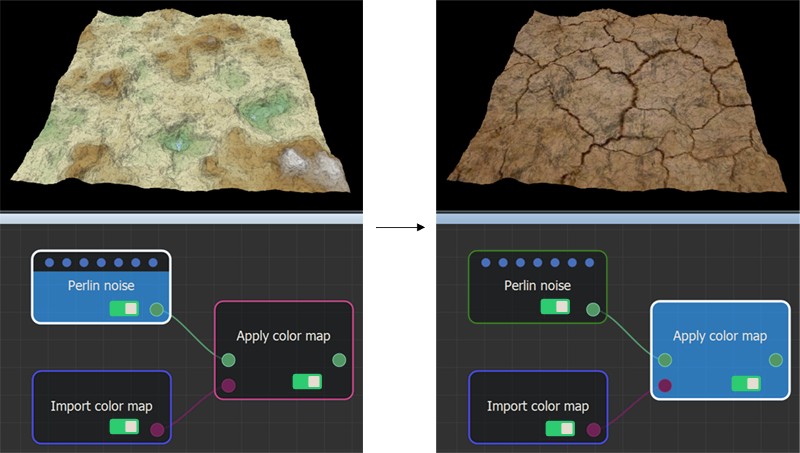
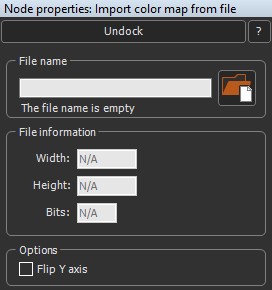
- Double click on the Import color map node to open its parameters. Browse to the color map and click OK to load it.

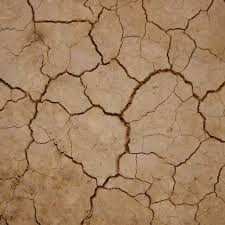
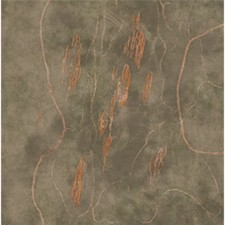
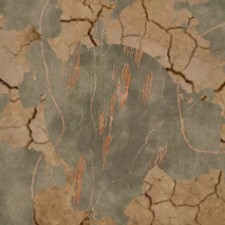
Here, we import the color map below.
- Click on the Apply color map node to view the impact of the color map on the terrain.
Compose terrains with color maps
We can also compose terrains and their color maps using the terrain composition nodes. We will compose our Perlin noise with a color map with a Half-sphere node with a color map.
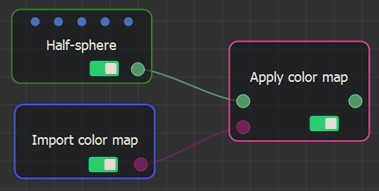
- Right-click in the Graph and select:
- Create node > Import > Import color map to add the color map node.
- Create node > Terrain generation > Half-sphere noise to add the Half-sphere node.
- Create node > Color > Apply color map to add the Apply color map node.
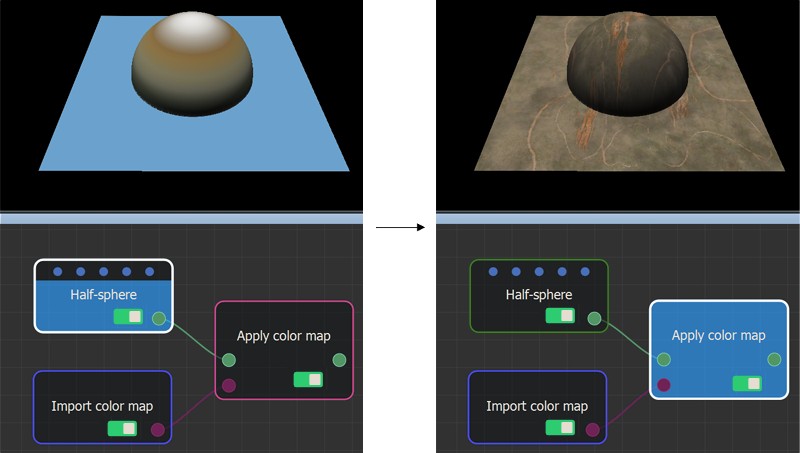
- Link the Import color map node and the Half-sphere node to the Apply color map node.
- Double click on the Import color map node to open its parameters. Browse to the color map and click OK to load it.
We import the color map below to modify the Half-sphere terrain generator.
- Click on the Apply color map node to view the impact of the color map on the terrain.
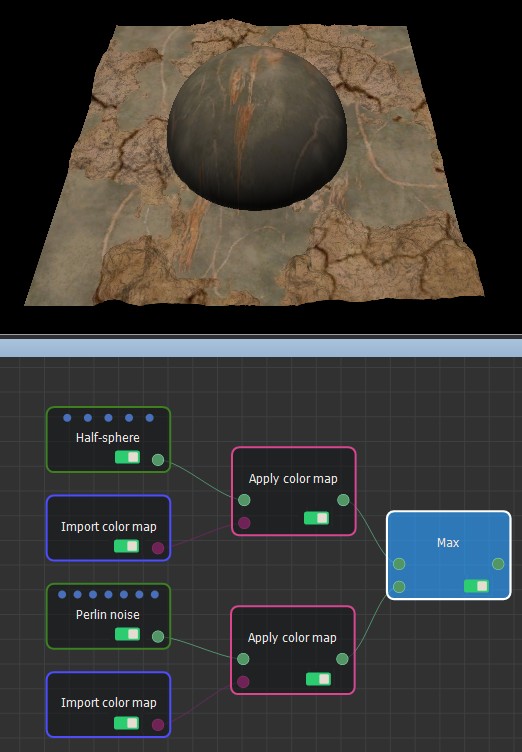
- We need to compose the terrains and to do so, we add a terrain composition node. Here, we are going to use a Max node. Right-click and select Create node > Terrain composition > Max to add the Max node, which takes the maximum value of two terrains. At each vertex, the value of the output terrain is the maximum value of both input terrains.
- Link both Apply color map nodes to the Max node as shown below.
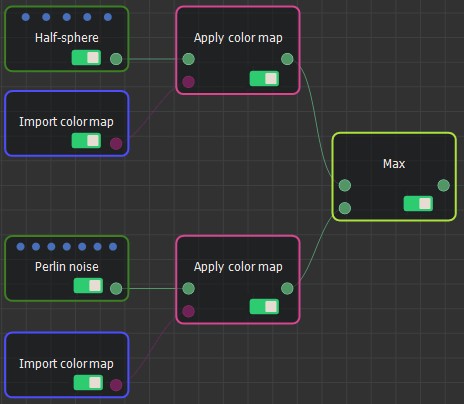
- Click on the Max node to view the impact of the color map on the terrain and on the composition. Both the terrains and their color maps are composed to give an output terrain.
Extract and apply a color map
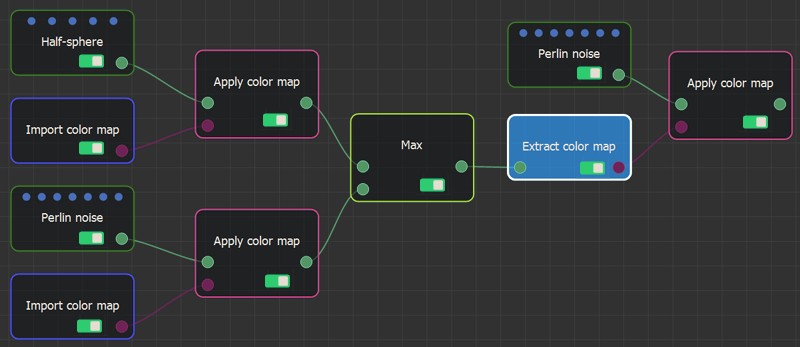
Once we have applied a color map to a terrain or two composed terrains with color maps, we can then extract the color map either to export it or to apply it to another terrain. Here, we will extract the color map from our composed terrains and apply it to a terrain generator.
- Right-click in the Graph and select:
- Create node > Color > Extract color map to add the Extract color map node.
- Create node > Color > Apply color map to add the Apply color map node.
- Create node > Terrain generation > Perlin noise to add the Perlin noise node.
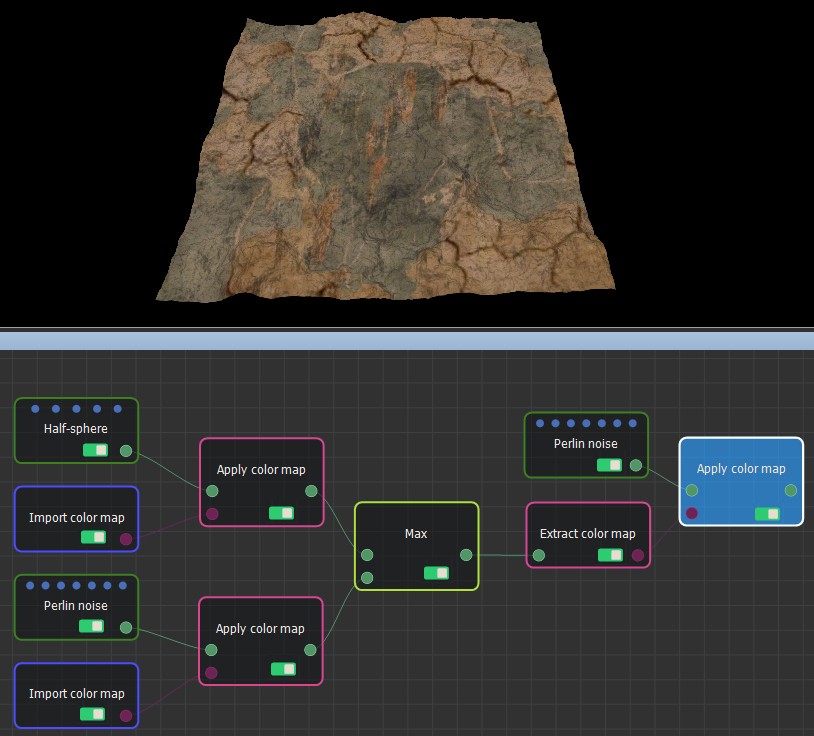
- Link the nodes as shown below.
- Click on the Apply color map node to see the effect on the Perlin noise generator.
Export a color map
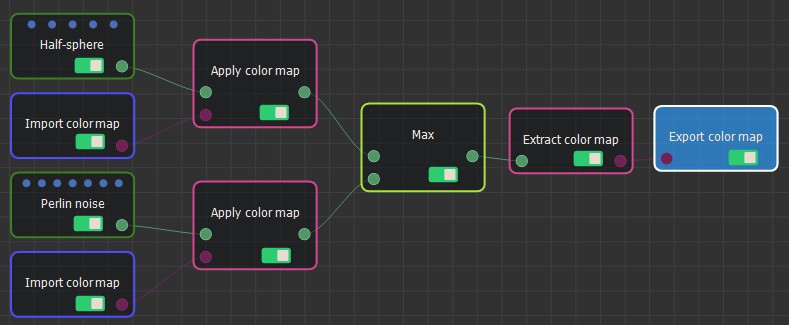
We can export the color map as an image file from a terrain or a terrain composition as a .tiff, .png, .tga, or .bmp file.
The Export color map node must be linked to an Extract color map node.
- Right-click in the Graph and select:
- Create node > Color > Extract color map to add the Extract color map node.
- Create node > Export > Export color map to add the Export color map node.
- Link the nodes to our project as shown below.
- Double click on the node to open its parameters and choose a file name and a directory and a file format. The output file is an RGB file with 8 bits per channel.
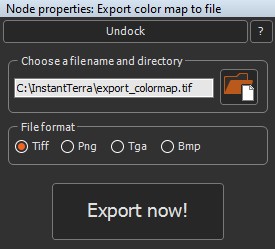
- Click the Export now! button, which triggers the color map calculation and saves it to a file. We can now use the exported color map.
Copyright © 2022 · All Rights Reserved · Wysilab