Adding a Advanced material node
Advanced material node - Tutorial video
The Advanced material node creates a material, which can then be applied to terrain with an Apply material node.
A material is a set of repeating textures (tiles) that can be applied to different places on a terrain according to rules based on elevation and slope. Each layer of a material contains exactly one sub-material. A sub-material contains a set of textures that correspond to a single effect, for example, a rock sub-material or a grass sub-material.
Below is an example of different sub-materials.

A material allows different sub-materials to be combined together using one sub-material per layer.
Below is an example of terrain before and after applying the default material:

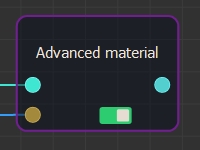
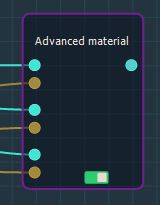
Unlike the Simple material node and the Material node, which use rules based on the elevation and slope of the terrain, the Advanced material node uses masks to determine where to apply each layer of the material. For each layer, it has an input connector to specify the sub-material to use and an input connector to specify the mask to use.
Below is an Advanced material node with one layer:
Below is an example of an Advanced material node with three layers:
Use a Sub-material node or User sub-material node to create a sub-material and connect it to the Advanced material node.
To add a Advanced material node, right-click in the Graph Editor and select Create Node > Materials > Advanced material or press the keyboard shortcut NADT (Node ADvanced Material).
Double click on the node to open its parameters.
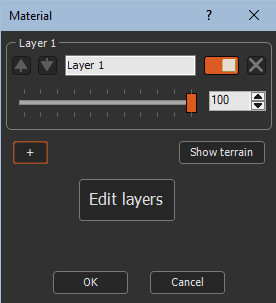
Editing the Advanced material node
The Advanced material node contains by default a single layer:
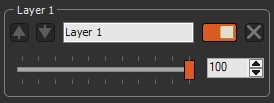
When connecting a sub-material, the name of the layer defaults to the name of the sub-material:
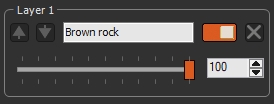
- Edit the material name by simply entering a new name.
- If the Material node is linked to an Apply material node, click
 to display in the 3D view the
terrain on which the material is applied.
 - Click
 to return to the
display of the material.
 -
 creates a new
layer.
 - The Intensity slider adjusts the intensity,
i.e. the layer opacity.
If the intensity is equal to 100%, the layer is completely opaque and completely masks the previous layers.
If the intensity is less than 100%, the layer is partially transparent, and reveals the previous layer.
Below is an example of a grass layer with an
intensity of 100% (left image) and an intensity of 50% right
image), which reveals the previous layer, a layer of rock.
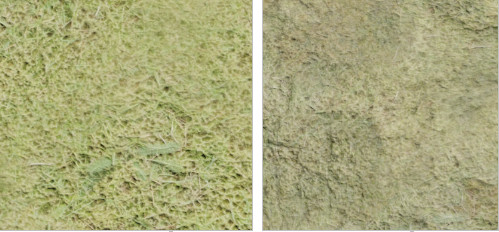
Intensity = 100% Intensity = 50%
If all the layers are partially transparent, the color of the terrain color map will be visible, if it has a color map. Otherwise, the color given by the terrain color ramp is visible.
- The different layers of a material are displayed successively.
The order of the layers is therefore important since a layer will
be displayed above the previous ones.
 change the order of the
layers by moving a layer up or down.
 disables or enables a
layer, which is useful for viewing the effect of a layer.
 deletes a layer.
Using masks
The parts of the terrain to which a layer of a material is applied are defined by a mask.
- The white parts of the mask correspond to the places where the layer is applied with an intensity of 100%. It is opaque.
- The gray parts of the mask correspond to the places where the layer is applied with an intensity proportional to the value of the mask. It is partially transparent.
To achieve the same behavior of the Simple material node and Material node, and apply the layers according to the altitude and the slope of the terrain, you can create masks from the Mask from heights node and Mask from slopes node, possibly with a Smooth node to create a transition.
You can use any mask:
- An imported mask.
- A mask painted with a Painted mask node to be able to position a layer very precisely.
- A generated mask, such as for example a flowmap mask generated from a Flow simulation node, or a sediment mask generated from a Hydraulic erosion node or Rock erosion node, a snow mask generated by from an Advanced snow node, etc.
See also:
Introduction
to materials
Sub-material node
User sub-material
node
Apply material
node
Simple material
node
Material node
Advanced
material node - Tutorial video
Parameters
| Parameter | Description |
|---|---|
| Show terrain | Displays in the 3D view the terrain on which the material is applied. |
| Show material | Returns to the display of the material. |
| Intensity | Adjusts the intensity, i.e. the layer opacity. |

|
Creates a new layer. |
| Size | Adjusts the size of the sub-material. |
| Intensity | Adjusts the intensity, i.e. the layer opacity. |

|
Changes the order of the layers by moving a layer up or down. |

|
Disables or enables a layer, which is useful for viewing the effect of a layer. |

|
Deletes a layer. |